How to make Flappy Bird Game – HTML, CSS and JavaScript
Creating games using HTML, CSS, and JavaScript is a fun way to improve your web development. One of the most popular games, the developers want to develop is Flappy Bird. I will guide you step by step to create your own Flappy Bird game. It is great for beginners and you will understand how games are made. By the end, you will have your own Flappy Bird game and a good understanding of game development. Let’s get started to create our Flappy Bird Game – HTML, CSS and JavaScript.
Introduction
Flappy Bird is a game that is simple to start but difficult to stop playing. You can control the bird’s movement using arrow keys or by touching your screen by moving up and down. Trying to fly through the pipes without crashing into the pipes is the most challenging part. If the bird hits a pipe or the ground, the game ends. The goal is to score points by flying through the gaps between the pipes.
In this, I will tell you everything that you need to create your Flappy Bird game. First, we’ll start with setting up the HTML and CSS. Then let’s move on to coding the game in JavaScript. We’ll also make the game look better by adding images and a scoreboard. By the end of this tutorial, you’ll have a complete Flappy Bird game that you can customize further.
Introduction to Game Development with HTML, CSS, and JavaScript
Importance of Learning Game Development
Game development is an excellent way to improve your problem-solving skills, improve your creativity, and you can also understand complex programming concepts. When you create games, it’s fun and helps you learn to code better. Plus, it feels really good when you finish and see your game working.
Overview of HTML, CSS, and JavaScript in Game Development
HTML (HyperText Markup Language) defines how things are organized on a web page. CSS (Cascading Style Sheets) makes everything look nice and styled. JavaScript controls how the game works and lets you interact with it. When you use these together, you can make cool and interactive stuff right in your web browser.
Setting Up the Project
Before we starts coding, let’s set up the project structure. Create a new directory for your project and inside it, create the following files:
index.htmlstyles.cssscript.js
We’ll start by setting up the HTML structure.
HTML Structure
Open index.html and add the following code:
<!DOCTYPE html>
<html lang="en">
<head>
    <meta charset="UTF-8">
    <meta name="viewport" content="width=device-width, initial-scale=1.0">
    <title>Flappy Bird Game - HTML, CSS, and JavaScript</title>
    <link rel="stylesheet" href="styles.css">
</head>
<body>
    <div id="game-container">
        <canvas id="gameCanvas"></canvas>
        <div id="start-screen">
            <button id="start-button">Start Game</button>
        </div>
        <div id="game-over-screen">
            <p id="final-score">Score: 0</p>
            <button id="retry-button">Retry</button>
        </div>
    </div>
    <script src="script.js"></script>
</body>
</html>
This HTML setup includes a main area for the game, a canvas where the game is drawn, and two screens: one for starting the game and another for when it ends. There are buttons for starting the game and trying again.
CSS Styling
Next, let’s add some basic styling to our game. Open styles.css and add the following code:
body, html {
    margin: 0;
    padding: 0;
    width: 100%;
    height: 100%;
    overflow: hidden;
}

#game-container {
    position: relative;
    width: 100vw;
    height: 100vh;
    overflow: hidden;
    border: 10px solid transparent;
    border-image: url('https://i.postimg.cc/8jZFYZyf/pngwing-com-1.png') 30 round;
    background-color: #70c5ce;
}

canvas {
    display: block;
    width: 100%;
    height: 100%;
    background: url('https://i.postimg.cc/cv6KGfj9/flappy-bird-background.jpg') no-repeat center center;
    background-size: cover;
}

#start-screen, #game-over-screen {
    position: absolute;
    top: 0;
    left: 0;
    width: 100%;
    height: 100%;
    display: flex;
    flex-direction: column;
    justify-content: center;
    align-items: center;
    background-color: rgba(0, 0, 0, 0.7);
    display: none;
}

#start-screen.active, #game-over-screen.active {
    display: flex;
}

#start-button, #retry-button {
    padding: 10px 20px;
    font-size: 18px;
    cursor: pointer;
}

#scoreboard {
    position: absolute;
    top: 10px;
    right: 10px;
    font-size: 20px;
    color: #FFF;
    background-color: rgba(0, 0, 0, 0.5);
    padding: 5px 10px;
    border-radius: 5px;
}

#final-score {
    font-size: 24px;
    color: #FFF;
}
This CSS design arranges how the game looks and where things go. We use a canvas to draw the game and put background pictures in the game area with a border around it. The screens for starting and ending the game stay hidden until you need to see them.
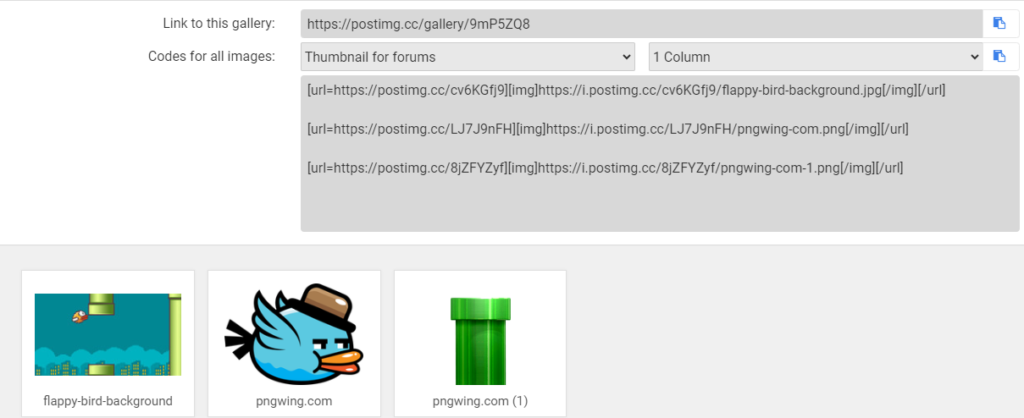
For this project, instead of creating a separate folder for images, I used the “https://postimg.cc/” website to generate image links, which I directly included in this code.
 border-image: url('https://i.postimg.cc/8jZFYZyf/pngwing-com-1.png') 30 round;
 url('https://i.postimg.cc/cv6KGfj9/flappy-bird-background.jpg')
 birdImage.src = 'https://i.postimg.cc/LJ7J9nFH/pngwing-com.png';
 pipeImage.src = 'https://i.postimg.cc/8jZFYZyf/pngwing-com-1.png';
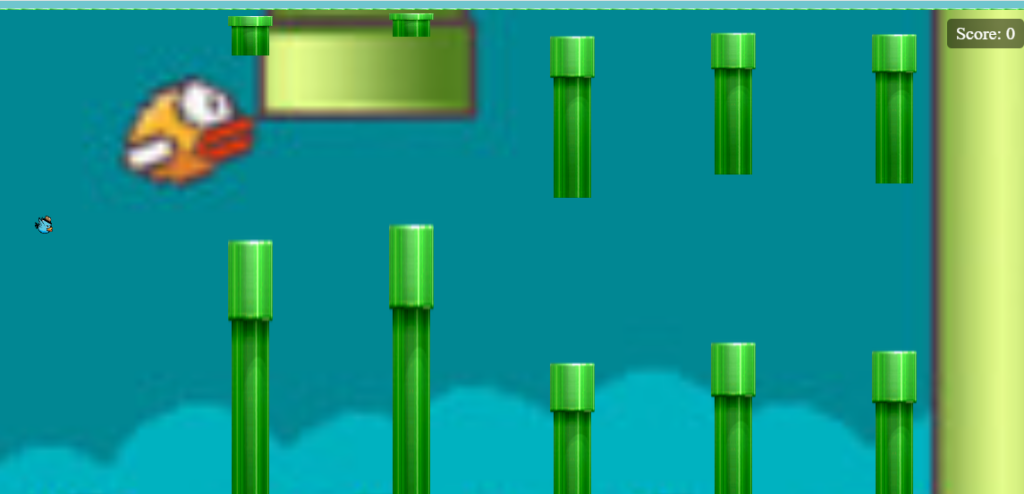
Before creating image link on website, first we need to download all the necessary images. Next, visit “https://postimg.cc/“, upload the images there, and it will generate a link. You can simply copy this link and paste it into your code. Here’s an example image to guide you:
JavaScript Game Logic
Now it’s time to implement the game logic using JavaScript. Open script.js and add the following code:
document.addEventListener('DOMContentLoaded', () => {
    const canvas = document.getElementById('gameCanvas');
    const ctx = canvas.getContext('2d');
    const startScreen = document.getElementById('start-screen');
    const gameOverScreen = document.getElementById('game-over-screen');
    const startButton = document.getElementById('start-button');
    const retryButton = document.getElementById('retry-button');
    const finalScore = document.getElementById('final-score');
    const scoreboard = document.createElement('div');
    scoreboard.id = 'scoreboard';
    document.getElementById('game-container').appendChild(scoreboard);

    const birdImage = new Image();
    birdImage.src = 'https://i.postimg.cc/LJ7J9nFH/pngwing-com.png';

    const pipeImage = new Image();
    pipeImage.src = 'https://i.postimg.cc/8jZFYZyf/pngwing-com-1.png';

    const bird = {
        x: 50,
        y: 150,
        width: 20,
        height: 20,
        speed: 4
    };

    const pipes = [];
    const pipeWidth = 50;
    const pipeGap = 150;
    let pipeInterval = 90;
    let frameCount = 0;
    let score = 0;
    let gameStarted = false;
    let gameEnded = false;

    canvas.width = window.innerWidth;
    canvas.height = window.innerHeight;

    window.addEventListener('resize', () => {
        canvas.width = window.innerWidth;
        canvas.height = window.innerHeight;
    });

    function drawBird() {
        ctx.drawImage(birdImage, bird.x, bird.y, bird.width, bird.height);
    }

    function drawPipes() {
        pipes.forEach(pipe => {
            ctx.drawImage(pipeImage, pipe.x, pipe.y, pipeWidth, pipe.height);
            ctx.drawImage(pipeImage, pipe.x, pipe.y + pipe.height + pipeGap, pipeWidth, canvas.height - pipe.y - pipe.height - pipeGap);
        });
    }

    function updateBird() {
        if (bird.y + bird.height > canvas.height || bird.y < 0 || bird.x + bird.width > canvas.width || bird.x < 0) {
            endGame();
        }
    }

    function updatePipes() {
        if (frameCount % pipeInterval === 0) {
            const pipeHeight = Math.floor(Math.random() * (canvas.height - pipeGap));
            pipes.push({ x: canvas.width, y: 0, height: pipeHeight });
        }

        pipes.forEach((pipe, index) => {
            pipe.x -= 2;
            if (pipe.x + pipeWidth < 0) {
                pipes.splice(index, 1);
                if (!gameEnded) score++;
                updateScore();
            }
            if (bird.x < pipe.x + pipeWidth && bird.x + bird.width > pipe.x && (bird.y < pipe.height || bird.y + bird.height > pipe.height + pipeGap)) {
                endGame();
            }
        });
    }

    function updateScore() {
        scoreboard.innerText = `Score: ${score}`;
    }

    function gameLoop() {
        ctx.clearRect(0, 0, canvas.width, canvas.height);
        drawBird();
        drawPipes();
        updateBird();
        updatePipes();
        frameCount++;
        if (!gameEnded) requestAnimationFrame(gameLoop);
    }

    function resetGame() {
        bird.x = 50;
        bird.y = 150;
        pipes.length = 0;
        score = 0;
        frameCount = 0;
        gameEnded = false;
        updateScore();
    }

    function endGame() {
        gameEnded = true;
        gameOverScreen.classList.add('active');
        finalScore.innerText = `Score: ${score}`;
    }

    function startGame() {
        gameStarted = true;
        startScreen.classList.remove('active');
        gameOverScreen.classList.remove('active');
        resetGame();
        gameLoop();
    }

    document.addEventListener('keydown', (e) => {
        if (gameStarted && !gameEnded) {
            if (e.key === 'ArrowUp') bird.y -= bird.speed;
            if (e.key === 'ArrowDown') bird.y += bird.speed;
            if (e.key === 'ArrowLeft') bird.x -= bird.speed;
            if (e.key === 'ArrowRight') bird.x += bird.speed;
        }
    });

    startButton.addEventListener('click', startGame);
    retryButton.addEventListener('click', startGame);
});
Advanced Game Mechanics
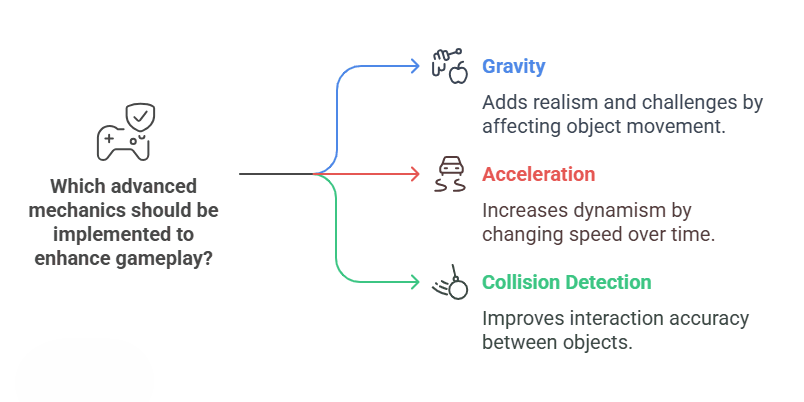
To make the game more challenging and fun, you can add features like gravity, acceleration, and better collision detection. These advanced mechanics will make the gameplay more exciting.
Gravity and Acceleration
You can add gravity to make the bird fall slowly instead of instantly. Create a gravity variable that changes the bird’s vertical position over time. This will make the bird’s movement more realistic.
Complex Collision Detection
To improve collision detection, you can check for collisions more precisely at the edges of the bird and pipes. This will stop the bird from seeming to pass through the edges of the pipes.
Optimizing Game Performance
To keep the game running smoothly, it’s important to optimize its performance. Here are some simple tips and techniques to help you do that:
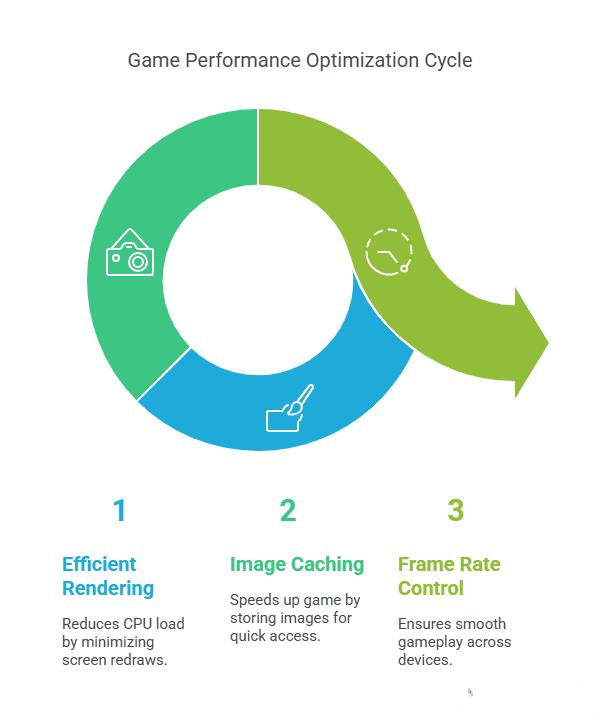
- Efficient Rendering: Use smart rendering methods to reduce the number of times you draw on the screen. This helps lower the CPU load.
- Image Caching: Save images so you don’t have to reload them every frame. This speeds up the game by reducing loading times.
- Frame Rate Control: Keep the game running smoothly on different devices by managing the frame rate. Use requestAnimationFrame to handle the game loop efficiently.
Responsive Design and Mobile Compatibility
To make the game playable on mobile devices, you need to add touch controls and ensure the game layout is responsive.
Touch Controls: Add event listeners for touch events to control the bird’s movement on mobile devices. Use touchstart, touchmove, and touchend events to detect touch interactions.
Responsive Layout: Make sure the game adapts to different screen sizes with responsive design techniques. Dynamically set the canvas size based on the window size and use CSS media queries to adjust the layout for different devices.
Adding Sound Effects and Music
Make the game more enjoyable by adding sound effects for the bird’s movements, collisions, and scoring. Use the Web Audio API to play sounds in the game.
Web Audio API: The Web Audio API lets you create and control audio in the game. You can load audio files, make sound effects, and control playback with JavaScript.
Game Over Screen Enhancements
Make the game over screen more engaging by adding animations and social sharing options.
Animations: Use CSS animations to add visual effects when the game ends. CSS transitions and animations can make the game over message and buttons appear more lively.
Social Sharing: Add social sharing buttons so players can share their scores on platforms like Facebook and X. Use social media APIs to make sharing easy.
Creating Levels and Increasing Difficulty
To keep players engaged, create multiple levels with different difficulties. Each level can have a unique background, pipe speed, and gap size.
Level Design: Design levels that get harder as players advance. Use different backgrounds and obstacles for each level.
Difficulty Progression: Make the game more challenging by gradually decreasing the gap size between pipes or increasing the pipe speed. This keeps the game exciting and challenging for players.
Debugging and Testing

Thoroughly test the game to find and fix any problems. Here are some common issues and how to debug them:
Common Issues
- Bird Movement: Make sure the bird moves smoothly and responds well.
- Collision Detection: Check that collisions are accurate and the bird doesn’t pass through pipes.
- Performance: Ensure the game runs smoothly on different devices.
Debugging Techniques
- Console Logging: Use console.log to check the game’s logic and spot issues.
- Breakpoints: Set breakpoints in the browser’s developer tools to pause the game and inspect variables.
- Performance Monitoring: Use the browser’s performance tools to analyze and improve the game’s performance.
Publishing Your Game
Once the game is complete, you can publish it online for others to play. Here are the steps to host your game:
Hosting
- Choose a Hosting Provider: Pick a place to store your game files, like GitHub Pages or Netlify.
- Upload Files: Put your HTML, CSS, and JavaScript files on the hosting provider.
- Deploy: Make your game live and get a link to share.
Sharing
- Social Media: Share your game link on social media to let more people play.
- Game Portals: Put your game on sites like itch.io and Game Jolt for more players to find.
Further Reading and Resources
To continue learning about game development, here are some additional resources:
- Books: “JavaScript for Kids: A Playful Introduction to Programming” by Nick Morgan, “Eloquent JavaScript” by Marijn Haverbeke.
- Tutorials: Mozilla Developer Network (MDN) web docs, freeCodeCamp, Codecademy.
Conclusion
Great job! You’ve built your own Flappy Bird game using HTML, CSS, and JavaScript. This tutorial has given you a strong start in game development, teaching you about game loops, collision detection, and managing scores.
Now that you’ve followed this step-by-step guide, you can create and personalize your own web games.
Keep exploring and making more games to improve your coding abilities and imagination. Game development is a big and exciting world, full of new things to discover and learn.





[…] How to make Flappy Bird Game – HTML, CSS and JavaScript […]