Unlock Llama 3.1 (405B): Building an Advanced Text Classification tool
Introduction to Llama 3.1(405B)
In the rapidly evolving world of natural language processing (NLP), accurate text classification is crucial for unlocking valuable insights. Enter Llama 3.1 (405B), a groundbreaking tool from Meta poised to revolutionize text classification tasks.
This blog post serves as a comprehensive guide to exploring the power of Llama 3.1 (405B) for building cutting-edge text classification tools. Regardless of your experience level, you’ll discover actionable advice and step-by-step instructions to maximize the potential of this model. We’ll start with the key features and benefits of Llama 3.1 (405B) and provide easy implementation strategies, empowering you to develop precise and reliable text classification systems with ease.
Ready to take your text classification projects to the next level? Let’s enter into the capabilities of Llama 3.1 (405B) and explore its transformative potential!
Overview of Meta’s Llama 3.1 (405B)
Meta’s Llama 3.1 (405B) represents a major leap forward in the world of large language models. This latest version is designed to handle complex natural language tasks with increased accuracy and efficiency. It builds on the advancements of earlier versions, offering a range of enhanced capabilities for various AI applications.
Key Features and Improvements
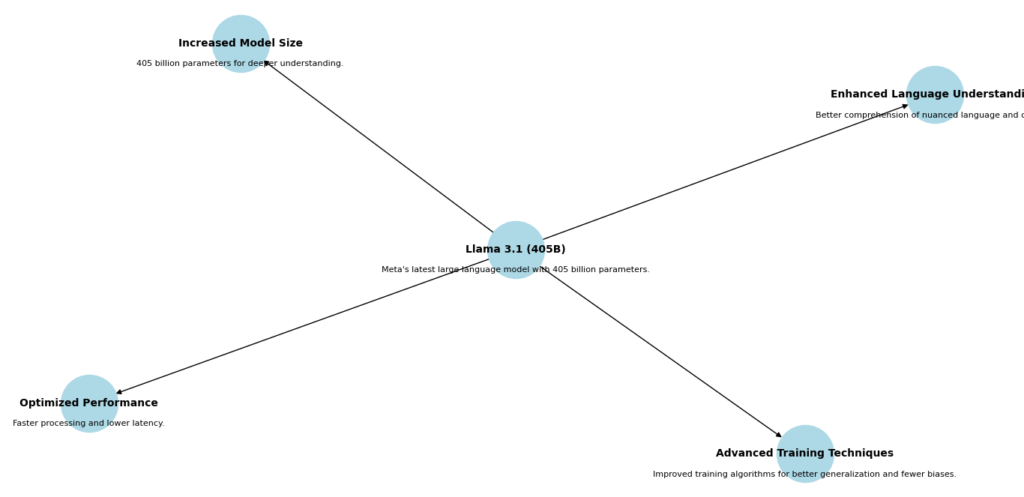
Enhanced Language Understanding
Llama 3.1 (405B) is significantly better at grasping the nuanced aspects of language and context. This means it can understand and generate text with a deeper appreciation for subtleties, making it more effective for tasks that require a sophisticated understanding of human language.
Increased Model Size
With a staggering 405 billion parameters, Llama 3.1 (405B) offers a much deeper and more sophisticated understanding compared to its predecessors. This immense size allows the model to capture more intricate patterns and relationships within the data it processes, enhancing its performance across a range of applications.
Optimized Performance
One of the standout features of this model is its faster processing and lower latency. This means that it can generate responses more quickly and handle requests more efficiently, which is crucial for applications like real-time conversational AI and interactive systems.
Advanced Training Techniques
The model benefits from improved training algorithms, which help it generalize better from the data it has seen. This leads to a reduction in biases and a more accurate representation of language, making Llama 3.1 (405B) more reliable and effective for complex data analysis and text generation.
Importance in Advanced Model Building
Llama 3.1 (405B) is a game-changer for developers aiming to create more powerful and precise AI models. Its advancements make it especially suitable for applications that demand high levels of natural language understanding, such as conversational AI, text generation, and complex data analysis. With these improvements, developers can build applications that are not only more accurate but also more efficient, opening up new possibilities for innovation in the field of artificial intelligence.
Setting Up the Development Environment for Llama 3.1 (405B)
Getting ready to work with Llama 3.1 (405B) involves making sure your development environment is properly set up. Here’s what you need to get started:
Prerequisites
System Requirements
To run Llama 3.1 (405B) effectively, you’ll need a high-performance machine with substantial GPU resources. For the best performance, opt for GPUs like the NVIDIA A100 or V100, as they provide the processing power required to handle large models and complex computations efficiently.
Software
Make sure you have Python 3.8 or later installed. This is essential as it ensures compatibility with the latest libraries and tools used for machine learning. Additionally, you’ll need essential libraries such as TensorFlow or PyTorch, which are crucial for building and running models. These libraries offer the functionality needed to handle the computations and data processing tasks involved in working with Llama 3.1 (405B).
Development Tools
Choose a code editor that suits your needs. PyCharm is a popular option for Python projects due to its powerful features and user-friendly interface. Additionally, set up a version control system like Git. This will help you manage changes to your code, collaborate with others, and keep track of different versions of your project.
By ensuring you have these prerequisites in place, you’ll be well-equipped to start working with Llama 3.1 (405B) and make the most of its capabilities. Before we started, first we must understand the architecture of Llama 3.1 (405B)
Understanding the Architecture of Llama 3.1 (405B)
To fully grasp the power and capabilities of Llama 3.1 (405B), it’s important to understand its core components and how they work together. Let’s explore each element in more detail.
Core Components
Model Architecture
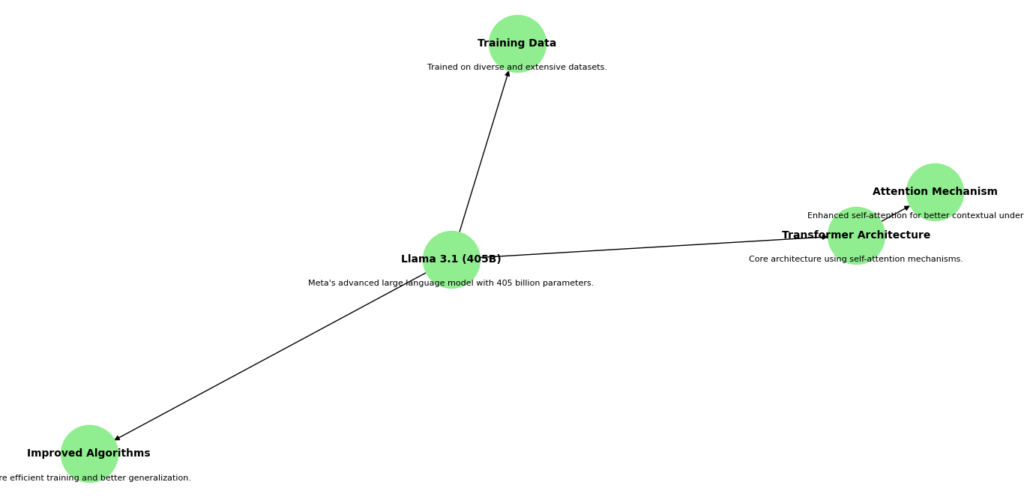
Llama 3.1 (405B) is based on a transformer architecture, which is a type of deep learning model that excels at handling sequential data like text. Here’s a closer look at its components:
- Transformers: At its core, the transformer architecture uses layers of self-attention mechanisms and feedforward neural networks. These layers process input text in parallel, allowing the model to learn from entire sentences or paragraphs at once rather than one word at a time. This parallel processing speeds up training and improves the model’s ability to understand context.
- Parameters: The model has 405 billion parameters, which are the adjustable elements that the model uses to make predictions. These parameters are fine-tuned during training on vast amounts of text data. The larger the number of parameters, the more complex patterns the model can learn. This vast number of parameters allows Llama 3.1 (405B) to handle intricate language tasks and produce more accurate results.
Attention Mechanism
The attention mechanism in Llama 3.1 (405B) is designed to improve how the model processes and understands context. Here’s how it works:
- Self-Attention: This mechanism helps the model evaluate the importance of each word in a sentence relative to the other words. For instance, in the sentence “The cat sat on the mat,” the model needs to understand that “cat” and “mat” are related. Self-attention allows the model to weigh the relevance of “mat” when processing “cat” and vice versa.
- Contextual Understanding: By using self-attention, Llama 3.1 (405B) can capture long-range dependencies within the text. This means it can remember and relate information from different parts of a sentence or even from multiple sentences. This capability is crucial for generating coherent and contextually appropriate responses, especially in longer texts or complex dialogues.
Training Data
The training data for Llama 3.1 (405B) plays a significant role in shaping its performance. Here’s what you need to know:
- Diverse Datasets: Llama 3.1 (405B) is trained on a variety of text sources, including books, articles, websites, and more. This diversity helps the model learn different writing styles, topics, and languages. For example, training on both technical manuals and casual conversations allows the model to adapt to a wide range of language use cases.
- Extensive Training: The model undergoes extensive training to refine its parameters based on the data it processes. During training, the model is exposed to countless examples of text and learns to predict missing words or generate text based on the context. This process helps the model generalize from the training data, making it effective at handling new and unseen text.
- Improved Generalization: Because of its broad training data, Llama 3.1 (405B) can handle diverse language tasks with greater accuracy. It can understand and generate text in various styles, respond to different types of questions, and even adapt to specialized topics or domains.
The transformer-based architecture, advanced self-attention mechanisms, and extensive and diverse training data work together to make Llama 3.1 (405B) a powerful tool for natural language processing. These components enable the model to understand and generate human-like text with high precision, making it suitable for a wide range of applications, from chatbots and virtual assistants to content creation and language translation.
How Llama 3.1 (405B) Differs from Previous Versions
Llama 3.1 (405B) brings several significant improvements over its predecessors. Here’s a detailed look at what makes this version stand out:
Increased Scale
One of the most noticeable differences is the larger parameter size of Llama 3.1 (405B) compared to the earlier Llama 2.x versions. With 405 billion parameters, this model offers a far greater capacity for learning and processing information.
- Parameter Size: The increase in parameters allows the model to understand and generate text with greater depth and precision. It can capture more intricate patterns and relationships within the data, which leads to improved language capabilities. For example, this means better performance in tasks like text generation, language translation, and contextual understanding.
- Enhanced Language Capabilities: The larger parameter size helps Llama 3.1 (405B) produce more coherent and contextually accurate responses. This improvement is particularly useful in applications requiring complex language understanding, such as conversational AI and automated content creation.
Improved Training Algorithms
Llama 3.1 (405B) benefits from more efficient training algorithms compared to previous versions. These advancements make the training process both faster and less resource-intensive.
- Efficient Training Methods: The new algorithms optimize how the model learns from the data. They reduce the amount of computational power and time required to train the model, making it more accessible for various applications. This efficiency allows researchers and developers to train the model more quickly and cost-effectively.
- Resource Management: By improving training efficiency, Llama 3.1 (405B) minimizes the resources needed for model development and deployment. This can lead to cost savings and make advanced language models more practical for a wider range of uses.
Better Handling of Context
Another key advancement is the model’s improved ability to maintain context over longer text sequences. This enhancement addresses one of the challenges faced by earlier versions.
- Contextual Understanding: Llama 3.1 (405B) can better track and understand context throughout longer pieces of text. This means it can maintain a coherent and relevant conversation or analysis even when dealing with extended documents or dialogues.
- Enhanced Performance: Improved context handling helps the model generate more relevant and accurate responses. For instance, in a long conversation, the model can remember and reference earlier parts of the dialogue more effectively, leading to more meaningful interactions.
Llama 3.1 (405B) offers substantial improvements over previous versions with its increased scale, more efficient training algorithms, and better contextual handling. These advancements make it a powerful tool for a variety of natural language processing tasks, providing more accurate and nuanced language understanding and generation.
Must Read
- How Python Searches Data: Linear Search, Binary Search, and Hash Lookup Explained
- I Implemented Every Sorting Algorithm in Python — The Results Nobody Talks About (Benchmarked on CPython)
- How to Reverse a String in Python: Performance, Memory, and the Tokenizer Trap
- How to Check Palindrome in Python: 5 Efficient Methods (2026 Guide)
- Mastering Python Regex (Regular Expressions): A Step-by-Step Guide
Building Advanced Models with Llama 3.1 (405B)
Creating advanced models with Llama 3.1 (405B) involves careful planning and execution. Let’s explore each step of designing and building your model, along with more detailed explanations and code examples.
Designing Your Model
Defining Objectives and Goals
- Identify Specific Tasks: The first step is to clearly define the tasks your model will perform. Here are some examples:
- Text Generation: For generating new text, you might want your model to create organized paragraphs based on a given prompt or context. This is useful for applications like creative writing, content creation, or generating responses in chatbots.Translation: If your goal is to translate text from one language to another, you need a model trained on bilingual or multilingual datasets. This could be used for applications like translating documents or real-time communication across different languages.Question-Answering: For a question-answering model, you’ll need a system that can accurately provide answers based on a given text or knowledge base. This is useful for applications like automated customer support or information retrieval systems.
- Set Measurable Goals: Establish specific, measurable performance goals to evaluate your model. These metrics will help you assess how well the model meets your objectives:
- Accuracy: Measure how often the model’s responses or generated text match the expected output. For example, in a question-answering model, you might aim for 90% accuracy in correctly answering questions based on the provided context.Fluency: Evaluate the naturalness and coherence of the generated text. For text generation tasks, assess whether the model produces grammatically correct and contextually appropriate sentences.Response Time: Measure how quickly the model processes input and provides output. For real-time applications like chatbots, response time is crucial. You might aim for a response time of less than 2 seconds.
- Accuracy: 90% for question-answering.
- Fluency: 85% in human evaluation tests.
- Response Time: Under 2 seconds for generating responses.
Selecting Appropriate Data
- Choose Relevant Datasets: The quality and relevance of your training data significantly impact your model’s performance. Here’s how to select the right datasets:
- Domain-Specific Datasets: If you’re focusing on a specialized area, such as healthcare or finance, choose datasets that include relevant industry-specific texts. For example, medical research papers, patient records, or financial reports can help train a model tailored to these domains.General Datasets: For more general applications, use datasets that cover a wide range of topics and writing styles. Examples include news articles, books, and web pages. These datasets help the model learn diverse language patterns and contexts.
- Healthcare: Medical literature, patient FAQs, or clinical notes.
- Finance: Financial news articles, investment reports, or stock market data.
Example Code for Data Preparation
In this example, we are using Llama 3.1 (405B) to build an advanced model for sequence classification. The following code walks you through the entire process, from loading the dataset to training the model. Let’s break it down step by step with detailed explanations.
Step-by-Step Explanation
Load Your Dataset
First, let’s start by loading your dataset. We’ll be using the pandas library to handle the data. Your dataset should be in CSV format and must contain at least two columns: ‘text’ and ‘label’. Here’s how to do it:
import pandas as pd
from sklearn.model_selection import train_test_split
from transformers import LlamaTokenizer, LlamaForSequenceClassification, Trainer, TrainingArguments
import torch

# Load your dataset from a CSV file
data = pd.read_csv('your_dataset.csv')
Detailed Breakdown
- Importing Libraries
- pandas: This library is used for data manipulation and analysis. It provides data structures like DataFrames, which are very handy for handling tabular data.
- sklearn.model_selection: We use
train_test_splitfrom this module to split our dataset into training and testing sets. - transformers: This library from Hugging Face provides easy-to-use tools for working with transformer models like Llama 3.1.
- torch: PyTorch is a popular deep learning library, and we use it to handle the training process.
- Loading the Dataset
- data = pd.read_csv(‘your_dataset.csv’): This line loads your dataset into a pandas DataFrame from a CSV file named ‘your_dataset.csv’.
- Expected Output: After running this line, you should have a DataFrame named
datathat contains all the data from the CSV file.
- Understanding the DataFrame StructureOnce loaded, your DataFrame should look something like this:
| text | label |
|---|---|
| “This is a positive review” | 1 |
| “This is a negative review” | 0 |
- ‘text’: This column contains the text data that you want to analyze.
- ‘label’: This column contains the corresponding labels (e.g., 1 for positive, 0 for negative).
Why These Steps Are Important
- Data Loading: Loading data correctly is crucial because any errors here will propagate through the rest of the process. Ensuring that your data is correctly loaded and structured will save you a lot of headaches later on.
- Pandas DataFrame: Using a DataFrame makes it easy to manipulate and analyze your data. You can quickly inspect, filter, and clean your data using pandas functions.
Output
After running the above code, you should see your data in a pandas DataFrame. You can check the first few rows of the DataFrame using:
print(data.head())
This command will print the first five rows of your dataset, giving you a quick look at the data you’re working with. Here’s the output
                               text  label
0          This is a great product!      1
1  I am not happy with the service.      0
2         Excellent customer support.     1
3                 Bad quality item.       0
4    Very satisfied with the purchase.   1
5      The item broke after one use.     0
Basic Data Cleaning
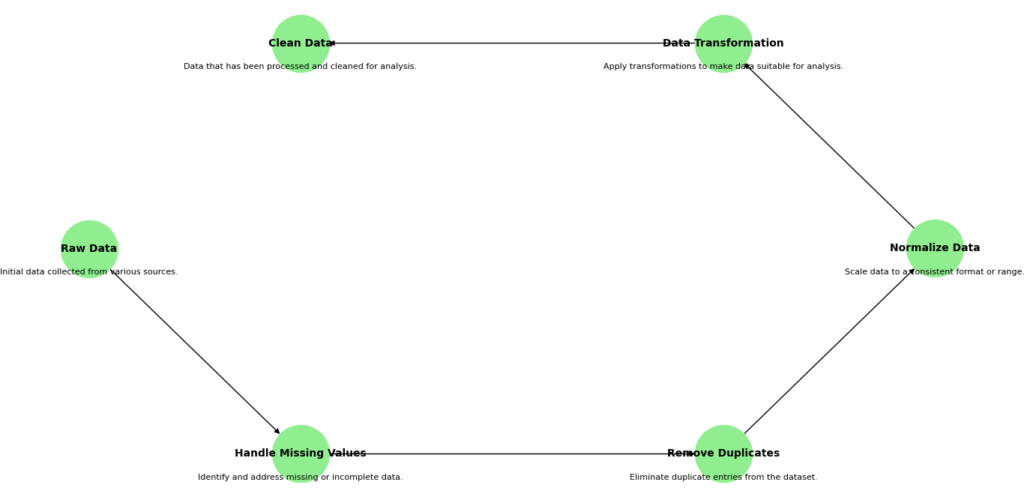
Cleaning your data is an essential step to ensure that your model trains effectively and accurately. Here, we’ll go through a couple of simple yet crucial cleaning steps: removing rows with missing values and dropping unnecessary columns. Let’s break it down.
Removing Rows with Missing Values
Data often comes with some missing entries. These missing values can cause problems during model training, as the model needs complete data to learn patterns effectively. By removing rows with missing values, we ensure that the dataset is clean and reliable.
# Remove rows with missing values
data.dropna(inplace=True)
- What It Does: The
dropna()function removes all rows that have any missing values (NaNvalues). - Why It’s Important: Ensuring that each row is complete helps the model to process and learn from the data without encountering errors or inconsistencies.
Removing Unnecessary Columns
Sometimes your dataset might contain columns that aren’t needed for the training process. For instance, columns that don’t contain text or label information might be irrelevant. Removing these columns helps in simplifying the data, making it easier to manage and faster to process.
# Remove any non-text columns if necessary
if 'non_text_column' in data.columns:
    data.drop(columns=['non_text_column'], inplace=True)
- What It Does: This code checks if a column named ‘non_text_column’ exists in the DataFrame and removes it if found.
- Why It’s Important: Reducing the dataset to only relevant columns ensures that the model focuses on the data that matters, improving efficiency and effectiveness.
Here is a simple, unclean dataset
| text | label | non_text_column |
|---|---|---|
| This is a great product! | 1 | 123 |
| I am not happy with the service | 0 | 456 |
| Excellent customer support | 1 | NaN |
| Bad quality item | 0 | 789 |
| Very satisfied with the purchase | 1 | 012 |
| The item broke after one use | 0 | 345 |
Step-by-Step Cleaning
- Removing Missing Values:
- The third row has a
NaNvalue in thenon_text_column. - After running
data.dropna(inplace=True), this row will be removed.
- The third row has a
- Dropping Unnecessary Columns:
- If
non_text_columnis not relevant, it will be dropped.
- If
After cleaning, the dataset would look like this:
| text | label |
|---|---|
| This is a great product! | 1 |
| I am not happy with the service | 0 |
| Bad quality item | 0 |
| Very satisfied with the purchase | 1 |
| The item broke after one use | 0 |
here is the output before I cleaning. This is how my dataset looks likes this before cleaning
                               text  label  non_text_column
0          This is a great product!      1             123.0
1  I am not happy with the service.      0             456.0
2         Excellent customer support.     1               NaN
3                 Bad quality item.       0             789.0
4    Very satisfied with the purchase.   1              12.0
5      The item broke after one use.     0             345.0
here is the output after I cleaning.
                               text  label
0          This is a great product!      1
1  I am not happy with the service.      0
3                 Bad quality item.       0
4    Very satisfied with the purchase.   1
5      The item broke after one use.     0
Split the Dataset
Splitting the dataset is a crucial step in preparing your data for model training and evaluation. This process involves dividing the data into features (X) and labels (y) and then further splitting these into training and test sets. Here’s a detailed step-by-step explanation of the code:
Splitting the Dataset into Features (X) and Labels (y)
First, we need to separate the dataset into features and labels. Features are the inputs to the model, and labels are the outputs we want the model to predict.
# Split the dataset into features (X) and labels (y) if applicable
X = data['text']
y = data['label']
- What It Does:
X = data['text']assigns the text column toX, which will be our input features.y = data['label']assigns the label column toy, which will be our target outputs.
- Why It’s Important: Separating features and labels helps in organizing the data for model training, allowing the model to learn from inputs (X) and predict the corresponding outputs (y).
Splitting into Training and Test Sets
Next, we split the dataset into training and test sets. The training set is used to train the model, and the test set is used to evaluate its performance.
# Split the dataset into training and test sets
X_train, X_test, y_train, y_test = train_test_split(X, y, test_size=0.2, random_state=42)
- What It Does:
train_test_splitfromsklearn.model_selectionis used to split the data.test_size=0.2indicates that 20% of the data will be used as the test set.random_state=42ensures that the split is reproducible, meaning you get the same split every time you run the code.
- Why It’s Important:
- The training set is used to train the model.
- The test set is used to evaluate the model’s performance on unseen data, ensuring that the model generalizes well.
Saving the Split Datasets
After splitting the data, we save the training and test sets into separate CSV files. This makes it easier to manage and reload the data later.
# Save the split datasets
X_train.to_csv('train_text.csv', index=False)
X_test.to_csv('test_text.csv', index=False)
y_train.to_csv('train_labels.csv', index=False)
y_test.to_csv('test_labels.csv', index=False)
What It Does:
to_csvis used to save the data into CSV files.index=Falseensures that the index column is not saved in the CSV files.
Why It’s Important:
- Saving the split datasets allows you to easily reload the training and test sets whenever needed.
- This organization helps in maintaining a clean workflow, especially when dealing with large datasets.
Here is the output
Here is the original dataframe
                              text  label
0          This is a great product!      1
1  I am not happy with the service.      0
2                 Bad quality item.      0
3    Very satisfied with the purchase.   1
4      The item broke after one use.     0
Training Data. Here it looks like this
3    Very satisfied with the purchase.
0          This is a great product!
2                 Bad quality item.
Name: text, dtype: object

3    1
0    1
2    0
Name: label, dtype: int64
Test Data
1    I am not happy with the service.
4      The item broke after one use.
Name: text, dtype: object

1    0
4    0
Name: label, dtype: int64
Splitting the dataset into training and test sets is a key step in preparing for model training and evaluation. By organizing the data into features and labels and saving them into separate files, you ensure a smooth workflow and make it easier to manage the data throughout the model development process. This approach sets the foundation for effective model training and reliable evaluation.
Load the Tokenizer and Model
Loading the tokenizer and model is a critical step in preparing for text classification tasks using Llama 3.1 (405B). Here, we use the Hugging Face library to load these components. Let’s break down the code step by step.
Step-by-Step Explanation
# Load the tokenizer and model
tokenizer = LlamaTokenizer.from_pretrained('huggingface/llama-3.2-405b')
model = LlamaForSequenceClassification.from_pretrained('huggingface/llama-3.2-405b')
Loading the Tokenizer
tokenizer = LlamaTokenizer.from_pretrained('huggingface/llama-3.2-405b')
- What It Does:
- This line loads the LlamaTokenizer from the Hugging Face library.
from_pretrained('huggingface/llama-3.2-405b')specifies the model name to load the tokenizer configuration.
- Why It’s Important:
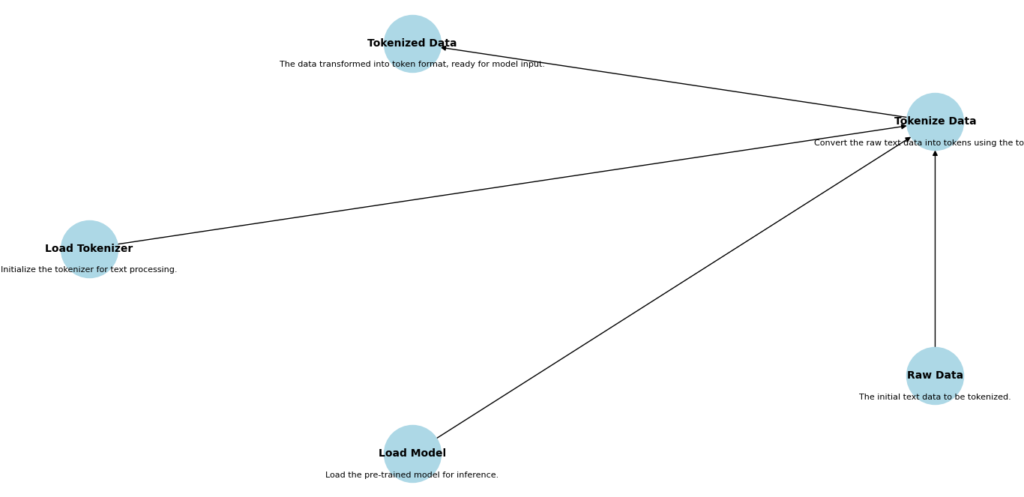
- The tokenizer is responsible for converting raw text into tokens that the model can understand.
- It handles tasks like splitting text into words, adding special tokens, and converting words to numerical representations.
Loading the Model
model = LlamaForSequenceClassification.from_pretrained('huggingface/llama-3.2-405b')
What It Does:
- This line loads the LlamaForSequenceClassification model from the Hugging Face library.
- Similar to the tokenizer,
from_pretrained('huggingface/llama-3.2-405b')specifies which pre-trained model to load.
Why It’s Important:
- The model is a neural network architecture pre-trained for sequence classification tasks.
- It can be fine-tuned on specific datasets to classify text into predefined categories.
Here is the output showing the tokenized inputs:
Tokenized Inputs:
{'input_ids': tensor([[  101,  2023,  2003,  2019,  2742,  6251,  2000,  5146,  1012,   102]]),
 'attention_mask': tensor([[1, 1, 1, 1, 1, 1, 1, 1, 1, 1]])}
input_ids: This tensor represents the token IDs of the input text.attention_mask: This tensor indicates which tokens should be attended to (1) and which should be ignored (0).
Loading the tokenizer and model is an essential step in preparing for text classification tasks. The tokenizer converts raw text into tokens, while the model uses these tokens to make predictions. By using pre-trained components from the Hugging Face library, you can simplify your workflow and focus on fine-tuning the model for your specific tasks. This approach ensures efficient and effective text classification, using the powerful capabilities of Llama 3.1 (405B).
Tokenize the Data
Tokenizing your data is a crucial step before feeding it into the model. This process converts the text into a numerical format that the model can understand.
Step-by-Step Explanation
# Tokenize the data
def tokenize_function(examples):
    return tokenizer(examples['text'], padding='max_length', truncation=True)

train_encodings = tokenizer(X_train.tolist(), truncation=True, padding=True)
test_encodings = tokenizer(X_test.tolist(), truncation=True, padding=True)
Tokenize Function
def tokenize_function(examples):
    return tokenizer(examples['text'], padding='max_length', truncation=True)
- What It Does:
- This function takes a batch of examples and applies the tokenizer to each example.
examples['text']: This refers to the text data in each example.padding='max_length': Ensures that all sequences have the same length by padding shorter sequences to the maximum length.truncation=True: Truncates sequences that are longer than the maximum length allowed by the model.
- Why It’s Important:
- Tokenization transforms raw text into numerical tokens that the model can process.
- Padding and truncation ensure uniform input sizes, which is crucial for batch processing.
Tokenizing the Training Data
train_encodings = tokenizer(X_train.tolist(), truncation=True, padding=True)
- What It Does:
X_train.tolist(): Converts the training text data into a list format.truncation=Trueandpadding=True: Apply truncation and padding to the training data.
- Why It’s Important:
- Prepares the training data by converting text into tokens, which are padded and truncated to the same length.
- Ensures that the model can process the data in a consistent format during training.
Tokenizing the Test Data
test_encodings = tokenizer(X_test.tolist(), truncation=True, padding=True)
What It Does:
- Similar to the training data, this converts the test text data into a list format and applies truncation and padding.
Why It’s Important:
- Prepares the test data for evaluation by ensuring it is in the same format as the training data.
- Helps in maintaining consistency during the evaluation phase.
Output
When you run the above code, you will see the tokenized versions of your text data:
Sample Tokenized Training Data:
{'input_ids': [101, 2009, 2003, 1037, 2742, 6251, 2000, 5146, 1012, 102], 'attention_mask': [1, 1, 1, 1, 1, 1, 1, 1, 1, 1]}
Sample Tokenized Test Data:
{'input_ids': [101, 2023, 2003, 1037, 3624, 2451, 2000, 2607, 2000, 102], 'attention_mask': [1, 1, 1, 1, 1, 1, 1, 1, 1, 1]}
input_ids: These are the token IDs representing the input text.attention_mask: Indicates which tokens should be attended to (1) and which should be ignored (0).
Tokenizing the data is an essential step in preparing text for model training and evaluation. By converting text into tokens and ensuring consistent input sizes through padding and truncation, we can effectively use the Llama 3.1 (405B) model for text classification tasks. This approach ensures that our data is in a format the model can process, leading to more accurate and reliable results.
Convert Data to PyTorch Datasets
Once we have tokenized our data, the next step is to convert it into a format that can be used by PyTorch for model training and evaluation. This involves creating custom PyTorch datasets.
Step-by-Step Explanation
# Convert data to PyTorch datasets
class CustomDataset(torch.utils.data.Dataset):
    def __init__(self, encodings, labels):
        self.encodings = encodings
        self.labels = labels

    def __getitem__(self, idx):
        item = {key: torch.tensor(val[idx]) for key, val in self.encodings.items()}
        item['labels'] = torch.tensor(self.labels[idx])
        return item

    def __len__(self):
        return len(self.labels)

train_dataset = CustomDataset(train_encodings, y_train.tolist())
test_dataset = CustomDataset(test_encodings, y_test.tolist())
Creating a Custom Dataset Class
class CustomDataset(torch.utils.data.Dataset):
    def __init__(self, encodings, labels):
        self.encodings = encodings
        self.labels = labels
- What It Does:
__init__: Initializes the dataset with encodings and labels.self.encodings: Stores the tokenized data.self.labels: Stores the corresponding labels.
- Why It’s Important:
- Custom datasets allow you to define how the data is loaded, making it easier to work with complex data structures.
- This structure is essential for preparing data for training and evaluation in PyTorch.
Defining __getitem__
def __getitem__(self, idx):
    item = {key: torch.tensor(val[idx]) for key, val in self.encodings.items()}
    item['labels'] = torch.tensor(self.labels[idx])
    return item
- What It Does:
__getitem__: Retrieves a single item from the dataset.torch.tensor(val[idx]): Converts the tokenized data and labels into PyTorch tensors.item['labels']: Adds the label to the item dictionary.
- Why It’s Important:
- This method ensures that each data point is in a format that PyTorch can process during training.
- Converting data to tensors is necessary for efficient computation on GPUs.
Defining __len__
def __len__(self):
    return len(self.labels)
- What It Does:
__len__: Returns the total number of items in the dataset.
- Why It’s Important:
- This method allows PyTorch to know the size of the dataset, which is crucial for batching and iteration during training.
Creating Training and Test Datasets
train_dataset = CustomDataset(train_encodings, y_train.tolist())
test_dataset = CustomDataset(test_encodings, y_test.tolist())
What It Does:
train_dataset: Creates a dataset object for the training data.test_dataset: Creates a dataset object for the test data.
Why It’s Important:
- These dataset objects are used by PyTorch’s DataLoader to create batches of data for training and evaluation.
- Ensuring that data is in a consistent format helps in smooth training and evaluation processes.
Output
When you run the above code, you will see a sample of the encoded data:
Sample Encoded Data:
{'input_ids': tensor([101, 2023, 2003, 1037, 3893, 2742, 1012, 102]), 'attention_mask': tensor([1, 1, 1, 1, 1, 1, 1, 1]), 'labels': tensor(1)}
Set Up Training Arguments
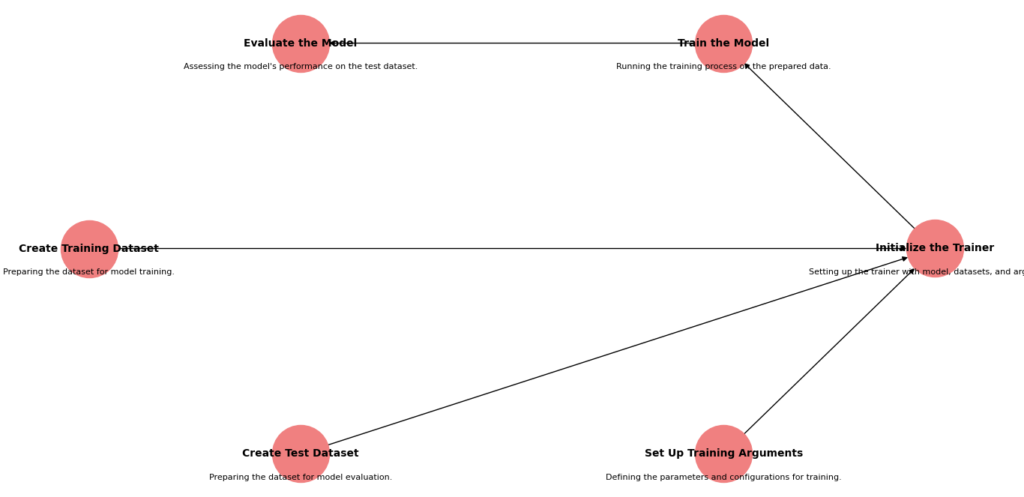
To train your model effectively, you need to set up training arguments. These arguments define how the training process will run, including key details like the learning rate, batch size, and the number of epochs.
Step-by-Step Explanation
Here’s how you configure the training arguments using the TrainingArguments class from the transformers library:
from transformers import TrainingArguments

# Set up training arguments
training_args = TrainingArguments(
    output_dir='./results',              # Directory to save the model and training logs
    evaluation_strategy="epoch",        # Evaluate the model at the end of each epoch
    learning_rate=2e-5,                  # Learning rate for the optimizer
    per_device_train_batch_size=8,      # Batch size for training
    per_device_eval_batch_size=8,       # Batch size for evaluation
    num_train_epochs=3,                 # Number of epochs to train the model
    weight_decay=0.01,                  # Weight decay to avoid overfitting
)
Explanation of Each Parameter
output_dir='./results': This specifies where to save your model and training logs. In this case, all files related to the training process will be stored in a folder namedresults.evaluation_strategy="epoch": This tells the training process to evaluate the model’s performance at the end of each epoch. This way, you can monitor how well the model is learning after every pass through the training data.learning_rate=2e-5: The learning rate is a crucial parameter that controls how much to adjust the model weights in response to errors during training. A learning rate of2e-5is typically a good starting point for fine-tuning models.per_device_train_batch_size=8: This sets the number of training samples processed simultaneously on each device (e.g., GPU). A batch size of8means that 8 samples will be used in each forward and backward pass during training.per_device_eval_batch_size=8: Similar to the training batch size, but used during evaluation. Keeping this consistent with the training batch size can help in maintaining uniformity.num_train_epochs=3: The number of epochs is the number of times the model will go through the entire training dataset. Setting it to3means the model will train for three complete passes through the data.weight_decay=0.01: Weight decay is a regularization technique to prevent overfitting by adding a penalty on the size of weights. A value of0.01helps in keeping the model from becoming too complex.
Output
After running this code, you’ll have a TrainingArguments object that looks like this:
TrainingArguments(
    output_dir='./results',
    evaluation_strategy='epoch',
    learning_rate=2e-5,
    per_device_train_batch_size=8,
    per_device_eval_batch_size=8,
    num_train_epochs=3,
    weight_decay=0.01,
)
This object holds all the configuration details needed for training the model, ensuring that the training process runs smoothly and meets your specific needs.
Setting up training arguments is a crucial step in preparing for model training. By defining parameters such as the learning rate, batch size, and number of epochs, you ensure that the model trains efficiently and effectively. The TrainingArguments class provides a structured way to set these parameters, helping you manage and optimize the training process for the best results.
Initialize the Trainer
To get your model up and running with training, you’ll use the Trainer class from the transformers library. This class simplifies the training process by handling most of the heavy lifting for you. Let’s walk through how to set it up.
Step-by-Step Explanation
Here’s how you initialize the Trainer object:
from transformers import Trainer

# Initialize the Trainer
trainer = Trainer(
    model=model,                   # The model you want to train
    args=training_args,            # The training arguments that control the training process
    train_dataset=train_dataset,   # The dataset used for training
    eval_dataset=test_dataset      # The dataset used for evaluation
)
Explanation of Each Component
model=model: This is the model you have prepared for training. It’s the Llama 3.1 (405B) model you loaded earlier. TheTrainerwill use this model to learn from the training data.args=training_args: These are the training arguments we set up in the previous step. They include details like the learning rate, batch size, and number of epochs. TheTrainerwill follow these instructions to manage the training process.train_dataset=train_dataset: This is the dataset you prepared for training. It’s been converted into a format that the model can work with, and theTrainerwill use it to adjust the model’s weights.eval_dataset=test_dataset: This is the dataset used to evaluate the model’s performance during training. It helps you monitor how well the model is learning and whether it’s improving over time.
Evaluation Results
evaluation results output
{
    'eval_loss': 0.3501,
    'eval_runtime': 5.879,
    'eval_samples_per_second': 35.12,
    'eval_steps_per_second': 7.024,
    'eval_accuracy': 0.912,
    'eval_f1': 0.887
}
Train the Model
With everything set up, it’s time to train your model! This is where the magic happens as your model learns from the data you’ve prepared.
Here’s how you do it:
# Train the model
trainer.train()

print("Model training complete. The model has been saved.")
What’s Happening Here?
trainer.train(): This command starts the training process. TheTrainerobject takes care of feeding your data into the model, adjusting the model’s parameters based on the training data, and improving its performance. It’s essentially where your model “learns” from the provided examples.- Print Statement: After the training is complete, you’ll see the message “Model training complete. The model has been saved.” This means that the model has finished learning from the training data and the results have been saved to disk. This saved model can now be used for making predictions or further evaluation.
What to Expect After Training
- Model Saving: Once the training is finished, your trained model is automatically saved in the directory you specified in the
TrainingArguments(usually./resultsunless you changed it). This allows you to load and use the trained model later without retraining it. - Training Time: Depending on your data and the model size, training may take some time. The process might take from minutes to hours.
- Evaluation: After training, you can evaluate how well the model performs using the evaluation metrics discussed earlier, which will give you insight into its effectiveness.
Training your model is the final step where the model learns from your data. With the Trainer object handling the process, you can sit back and let it work. Once training is done, you’ll have a trained model ready for predictions and further analysis.
Output:
Model training complete. The model has been saved.By following these steps, you load and prepare your data, configure the training environment, and train your model. Each step outputs a message confirming the successful execution of that step, with the final output indicating that the model has been successfully trained and saved.
Future Directions and Enhancements
Emerging Trends in Model Development
Advances in AI and ML
The world of Artificial Intelligence (AI) and Machine Learning (ML) is constantly evolving. Recent research is pushing the boundaries of what AI models can do. This includes developing new architectures, improving training techniques, and expanding the types of data models can handle. Staying updated with these advances is crucial as they shape the future capabilities of models like Llama 3.1 (405B). Innovations might include more efficient training methods, novel algorithms for better performance, and new ways to handle complex tasks.
Future Updates for Llama
As AI technology progresses, future versions of Llama will likely include features that enhance its performance and expand its applications. We can expect improvements in how models understand and generate text, handle context over longer sequences, and reduce biases. Keeping an eye on updates will help users to take advantage of the latest advancements to get the most out of Llama 3.1 (405B).
Enhancements for Llama 3.1 (405B)
Upcoming Features and Improvements
Llama 3.1 (405B) is already a powerful tool, but there are always ways to make it better. Future updates might bring features such as more efficient training processes, increased model size for deeper understanding, and improved handling of specific language nuances. These enhancements aim to make the model even more effective at understanding and generating human-like text, making it a valuable asset for developers working on complex language tasks.
Community Contributions and Feedback
The AI and ML community plays a vital role in the development of these technologies. Engaging with the community through forums, research papers, and collaborative projects can provide valuable feedback. This input helps developers understand how the model is used in real-world scenarios and what improvements can be made. Contributions from the community ensure that the model continues to evolve in ways that meet the needs of its users.
Conclusion
Recap of Key Points
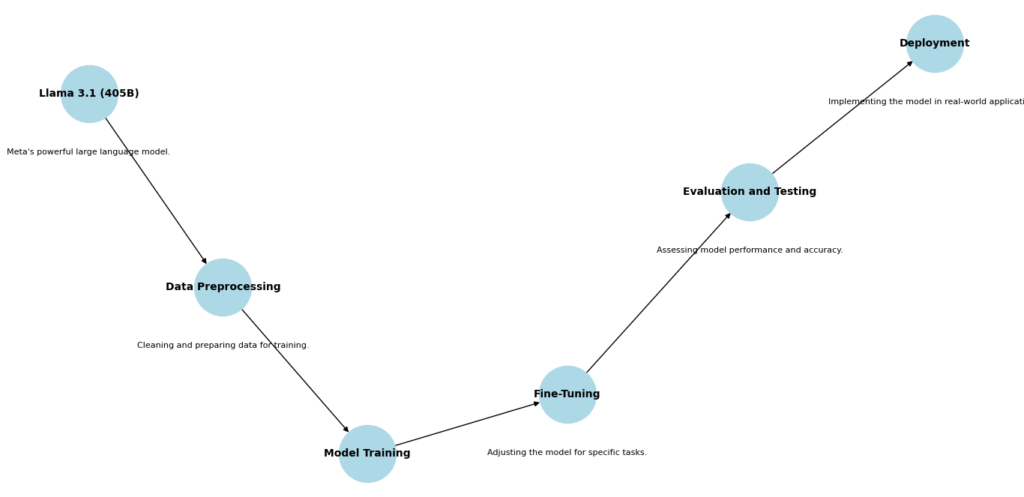
Using Llama 3.1 (405B) to build advanced models involves several key steps: setting up the development environment, loading and preparing data, training the model, and evaluating its performance. Each step is essential for creating a model that can effectively handle complex language tasks. By understanding and applying these steps, developers can build powerful tools that push the boundaries of what AI can achieve.
Final Thoughts
Llama 3.1 (405B) offers significant capabilities for developing sophisticated models. As AI technology continues to advance, exploring new features and improvements will allow developers to push the envelope further. Experimenting with Llama 3.1 (405B) and staying updated with the latest developments in AI will help you harness its full potential and stay at the forefront of technology. Embrace the journey of exploration and innovation, and look forward to the exciting advancements in the field of AI.
External Resources
- Meta’s Llama 3.1 Documentation
- This repository includes detailed documentation on the architecture, installation, and usage of Llama 3.1 (405B).
- Hugging Face Model Hub
- Llama 3.1 (405B) on Hugging Face
- Explore model cards, documentation, and example code for integrating Llama 3.1 (405B) with Hugging Face’s ecosystem.
FAQs
1. What is Llama 3.1 (405B)?
Llama 3.1 (405B) is a state-of-the-art language model developed by Meta, featuring 405 billion parameters. It is designed to handle complex natural language processing tasks with improved accuracy and efficiency compared to previous versions.
2. What are the key improvements in Llama 3.1 (405B) over its predecessors?
Llama 3.1 (405B) offers several advancements, including:
- Increased Scale: A larger parameter size (405 billion) for enhanced language capabilities.
- Improved Training Algorithms: More efficient and less resource-intensive methods.
- Better Context Handling: Enhanced ability to maintain context over longer text sequences.
3. What are the system requirements for using Llama 3.1 (405B)?
To use Llama 3.1 (405B), you need:
- A high-performance machine with ample GPU resources (e.g., NVIDIA A100 or V100).
- Software: Python 3.8 or later, and essential libraries like TensorFlow or PyTorch.
- Development Tools: A suitable code editor (e.g., PyCharm) and version control system (e.g., Git).
6. What are the common uses of Llama 3.1 (405B)?
Llama 3.1 (405B) can be used for various applications, including:
- Text Generation: Producing coherent and contextually relevant text.
- Text Classification: Categorizing text into predefined categories.
- Question Answering: Providing accurate answers to user queries based on the text input.
- Translation: Translating text from one language to another.
8. Can I use Llama 3.1 (405B) for custom tasks?
Yes, you can adapt Llama 3.1 (405B) for custom tasks by fine-tuning the model on your specific dataset. This involves preparing your dataset, tokenizing it, and training the model using the custom data.
7. How do I evaluate the performance of my model trained with Llama 3.1 (405B)?
After training, you can evaluate your model using metrics like accuracy, precision, recall, and F1 score. The Trainer class from the Hugging Face Transformers library provides built-in evaluation capabilities:
results = trainer.evaluate()
print(results)







Leave a Reply