How to Cartoonizing an Image using OpenCV – Python
Introduction
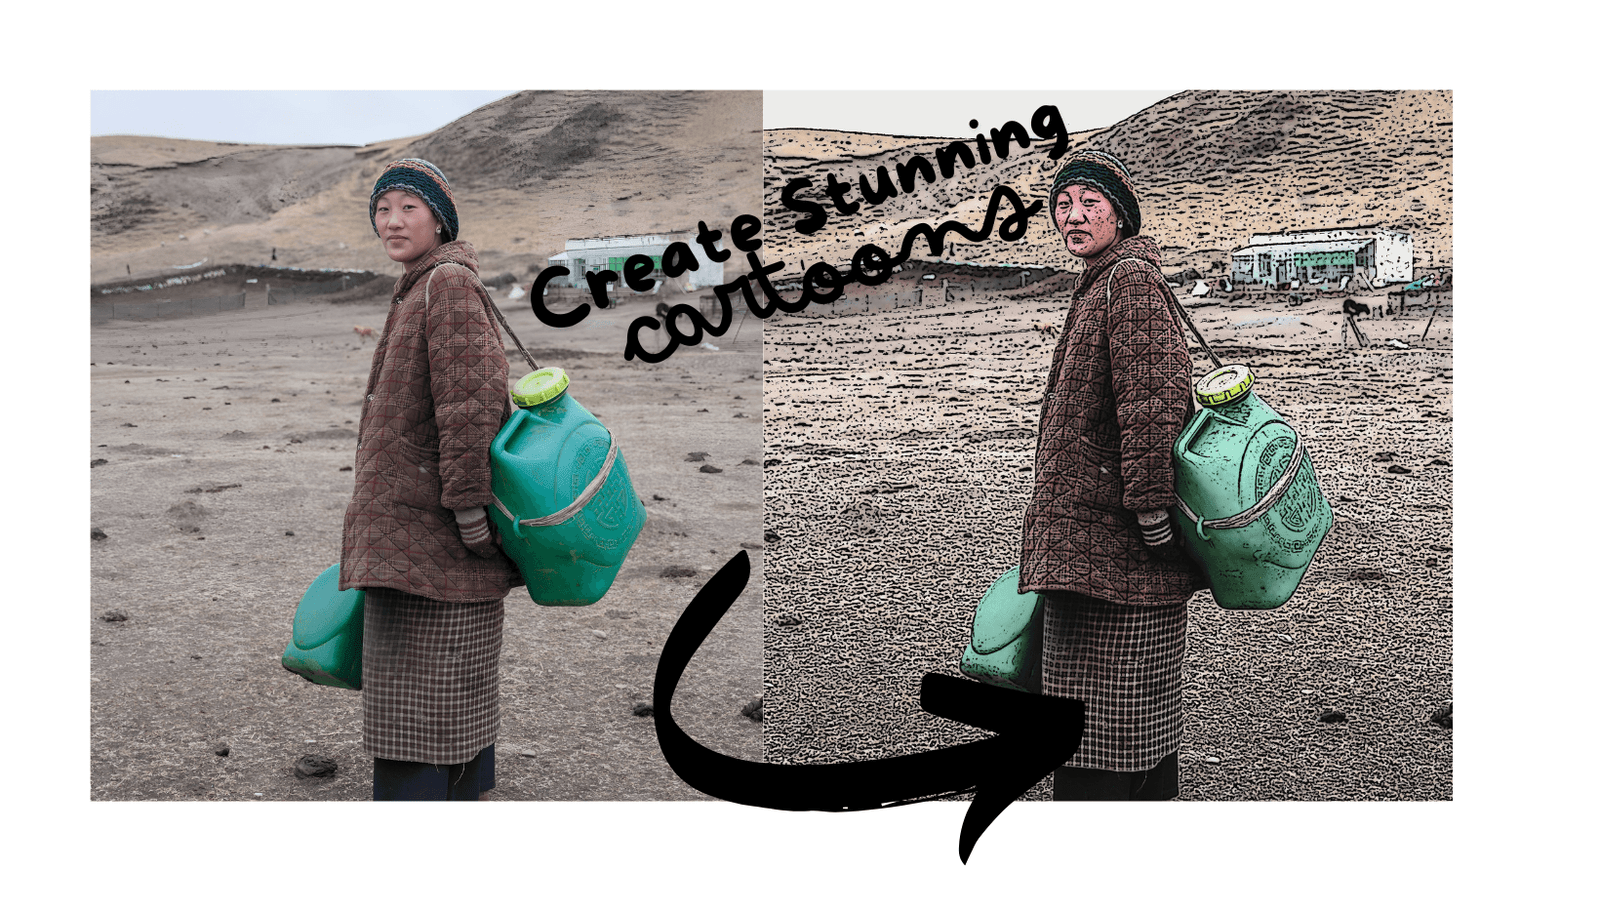
Welcome to our interesting guide on how to cartoonizing an image using OpenCV and Python. In this tutorial, we’ll show you how to turn your regular photos into fun, cartoon-like pictures using the powerful image processing library, OpenCV. This guide is best for anyone interested in image processing, computer vision, or Python programming.
Whether you’re new to this field or have some experience, this tutorial will break down each step with clear explanations and code examples. We aim to make it simple and enjoyable for everyone. Let’s get started!
Importance of Image Processing in Various Fields
Image processing is incredibly important in many different fields. It’s used in everything from medical imaging and scientific research to entertainment and social media. By transforming and analyzing images, we can gain new insights, enhance visual content, and even create art.
One popular technique in image processing is cartoonizing an image. This process can make photos look like they’ve been hand-drawn by an artist, adding a playful and artistic touch.
Overview of Popular Image Processing Libraries
There are several popular libraries for image processing, but one of the most powerful and widely used is OpenCV. It offers a range of tools for tasks like cartoonizing an image, object detection, and facial recognition. With OpenCV, you can easily convert an image to cartoon style using Python.
Other notable libraries include PIL (Python Imaging Library) and scikit-image, but OpenCV stands out due to its extensive functionality and active community support. If you want to learn how to cartoonize a photo, an OpenCV tutorial is a great place to start.
In this guide, we’ll focus on cartoonizing with OpenCV, demonstrating how to achieve the cartoon effect in Python.
Must Read
- How Python Searches Data: Linear Search, Binary Search, and Hash Lookup Explained
- I Implemented Every Sorting Algorithm in Python — The Results Nobody Talks About (Benchmarked on CPython)
- How to Reverse a String in Python: Performance, Memory, and the Tokenizer Trap
- How to Check Palindrome in Python: 5 Efficient Methods (2026 Guide)
- Mastering Python Regex (Regular Expressions): A Step-by-Step Guide
Detailed Explanation of OpenCV
History and Development of OpenCV
OpenCV, short for Open Source Computer Vision Library, was developed by Intel in 1999 to advance real-time computer vision. Since then, it has grown into one of the most popular and widely used libraries for image processing and computer vision. OpenCV is now an open-source project supported by a large community of developers and researchers, making continuous improvements and adding new features.
Key Features and Capabilities of OpenCV
OpenCV offers a vast array of features and capabilities that make it a powerful tool for image processing:
- Image Manipulation: OpenCV allows you to perform various image manipulation tasks, such as filtering, transforming, and enhancing images. This includes applying a cartoon effect to your photos.
- Computer Vision: It provides tools for detecting objects, faces, and even human gestures in images and videos.
- Machine Learning Integration: OpenCV supports machine learning algorithms, enabling advanced image analysis and recognition.
- Real-Time Processing: It is optimized for real-time image processing, making it ideal for applications like video surveillance and augmented reality.
Comparison with Other Image Processing Libraries
While OpenCV is one of the most powerful image processing libraries, there are other options available:
- PIL (Python Imaging Library): PIL is a simple and easy-to-use library for basic image manipulation tasks. However, it lacks the advanced features and speed of OpenCV.
- scikit-image: This library is part of the scikit-learn ecosystem and provides a wide range of image processing functions. It is user-friendly but may not offer the same level of performance as OpenCV for real-time applications.
- TensorFlow and PyTorch: These libraries are primarily used for deep learning but also offer powerful image processing capabilities. They can be more complex to use compared to OpenCV.
In summary, if you want to learn how to cartoonize a photo, an OpenCV is a great choice. OpenCV’s vast features and real-time processing capabilities make it the best tool for Python image cartoonization.
Setting Up Your Development Environment
Setting up your Python environment to work with OpenCV for cartoonizing an image involves few steps:
Prerequisites
Before we start the coding part, ensure you have the following installed on your machine:
- Python (version 3.6 or above)
- OpenCV library (
opencv-python) - Numpy library (
numpy)
You can install the necessary libraries using pip. let’s see in detail
Detailed Guide on Setting Up Python and OpenCV
- Start by installing Python on your system. You can download the latest version from the official Python website (python.org) and follow the installation instructions.
- Make sure to add Python to your system’s PATH during installation.
- Install OpenCV: Once Python is installed, you can install OpenCV using Python’s package manager, pip. Open a command prompt or terminal and run:
pip install opencv-python
This command installs the main OpenCV package for Python.
Verify Installation: After installation, verify that OpenCV is correctly installed by importing it in a Python script:
import cv2
print(cv2.__version__)
This should print the version of OpenCV installed, confirming that it’s ready for use.
Troubleshooting Common Installation Issues
- Dependency Errors: Sometimes, installing OpenCV may require additional dependencies or specific versions of libraries like numpy. Make sure all dependencies are installed correctly by checking error messages during installation.
- Compatibility Issues: Ensure that Python and OpenCV versions are compatible with your operating system. Check the OpenCV documentation for any specific OS-related instructions or issues.
- Permissions: On some systems, you might need administrative privileges to install Python packages. Run the installation commands with appropriate permissions if you encounter permission errors.
Alternative Installation Methods (e.g., Using Anaconda)
If you prefer using Anaconda for managing your Python environment:
- Install Anaconda: Download and install Anaconda from the official website (anaconda.com). Anaconda comes with Python and many popular libraries pre-installed, including OpenCV.
- Create a New Environment: You can create a new Python environment using Anaconda:
conda create --name myenv python=3.8
Replace myenv with your desired environment name and specify the Python version if needed.
Install OpenCV: Activate your environment and install OpenCV using conda:
conda install -c conda-forge opencv
This command installs OpenCV from the conda-forge channel.
By following these steps, you’ll have Python and OpenCV set up on your system or within an Anaconda environment, ready for creating Python image cartoonization projects.
Step-by-Step Guide to Cartoonizing an Image
1. Importing Libraries
First, we need to import the necessary libraries. OpenCV for image processing and Numpy for numerical operations.
import cv2
import numpy as np
2. Loading the Image
Next, we load the image that we want to cartoonize. Use the cv2.imread function to read the image from your filesystem.
image = cv2.imread('path_to_your_image.jpg')
3. Displaying the Original Image
Before we start the cartoonizing process, let’s display the original image to understand what we are working with.
cv2.imshow('Original Image', image)
cv2.waitKey(0)
cv2.destroyAllWindows()
4. Converting to Grayscale
Convert the image to grayscale to simplify the edge detection process.
gray = cv2.cvtColor(image, cv2.COLOR_BGR2GRAY)
5. Applying Median Blur
Apply a median blur to reduce noise in the grayscale image. This step helps in achieving smoother edges.
gray_blur = cv2.medianBlur(gray, 5)
6. Edge Detection
Use the adaptive thresholding technique to detect edges in the image. This step is crucial as it creates the cartoon-like effect by outlining the objects in the image.
edges = cv2.adaptiveThreshold(gray_blur, 255, cv2.ADAPTIVE_THRESH_MEAN_C, cv2.THRESH_BINARY, 9, 9)
7. Reducing Noise
Convert the original image to a bilateral filter to reduce noise and keep the edges sharp.
color = cv2.bilateralFilter(image, 9, 300, 300)
8. Combining Edges and Color
Combine the edges and the color image to get the final cartoon effect.
cartoon = cv2.bitwise_and(color, color, mask=edges)
9. Displaying the Cartoon Image
Finally, display the cartoonized image.
cv2.imshow('Cartoon Image', cartoon)
cv2.waitKey(0)
cv2.destroyAllWindows()
Full Code
Here’s the complete code for cartoonizing an image using OpenCV:
import cv2

class Cartoonizer:
    def __init__(self):
        pass

    def render(self, img_path):
        try:
            # Try to read the image
            img_rgb = cv2.imread(img_path)

            if img_rgb is None:
                raise ValueError("Unable to read image file, please check the path or file format.")

            # Convert image to grayscale
            img_gray = cv2.cvtColor(img_rgb, cv2.COLOR_BGR2GRAY)

            # Smooth the image using bilateral filter
            img_blur = cv2.medianBlur(img_gray, 7)

            # Apply adaptive thresholding to get the edges
            edges = cv2.adaptiveThreshold(img_blur, 255, cv2.ADAPTIVE_THRESH_MEAN_C, cv2.THRESH_BINARY, 9, 2)

            # Combine color image with edges
            color = cv2.bilateralFilter(img_rgb, 9, 300, 300)
            cartoon = cv2.bitwise_and(color, color, mask=edges)

            return cartoon

        except Exception as e:
            print(f"Error: {e}")
            return None

# Example usage:
if __name__ == "__main__":
    # Get input image path from user
    input_image_path = input("Enter the path to your input image: ")

    # Get output image path
    output_image_path = input("Enter the path where you want to save the cartoonized image: ")

    cartoonizer = Cartoonizer()
    cartoon_image = cartoonizer.render(input_image_path)

    if cartoon_image is not None:
        cv2.imwrite(output_image_path, cartoon_image)
        print(f"Cartoonized image saved at {output_image_path}")
    else:
        print("Cartoonization failed. Please check the error message above.")
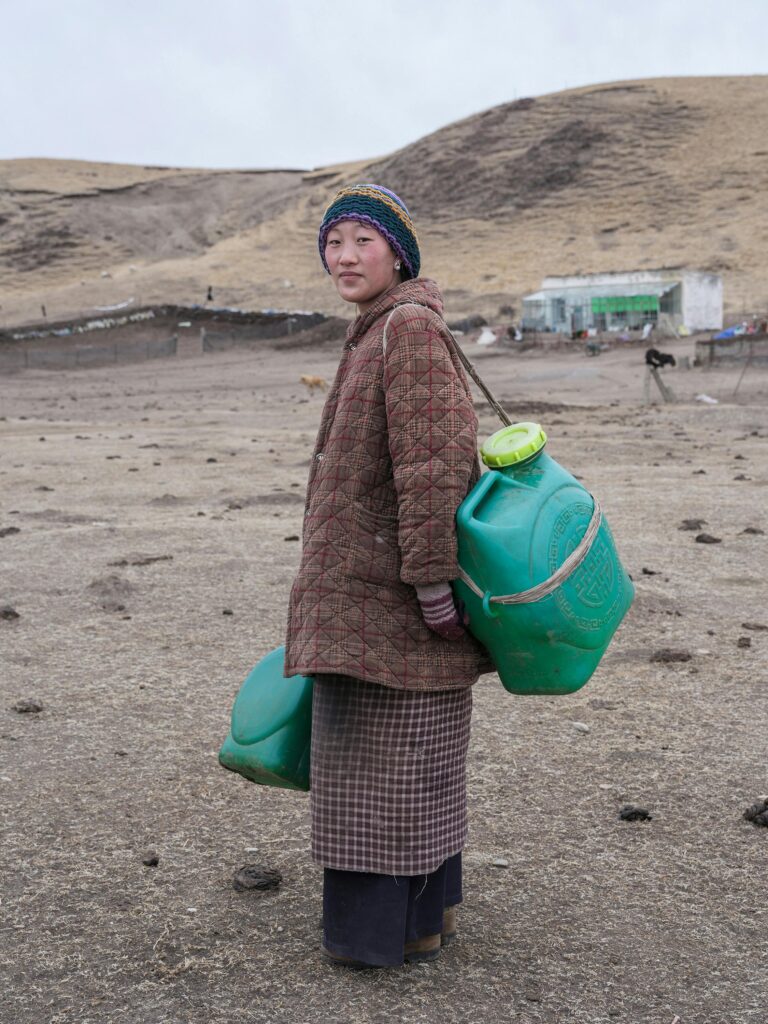
Input Image
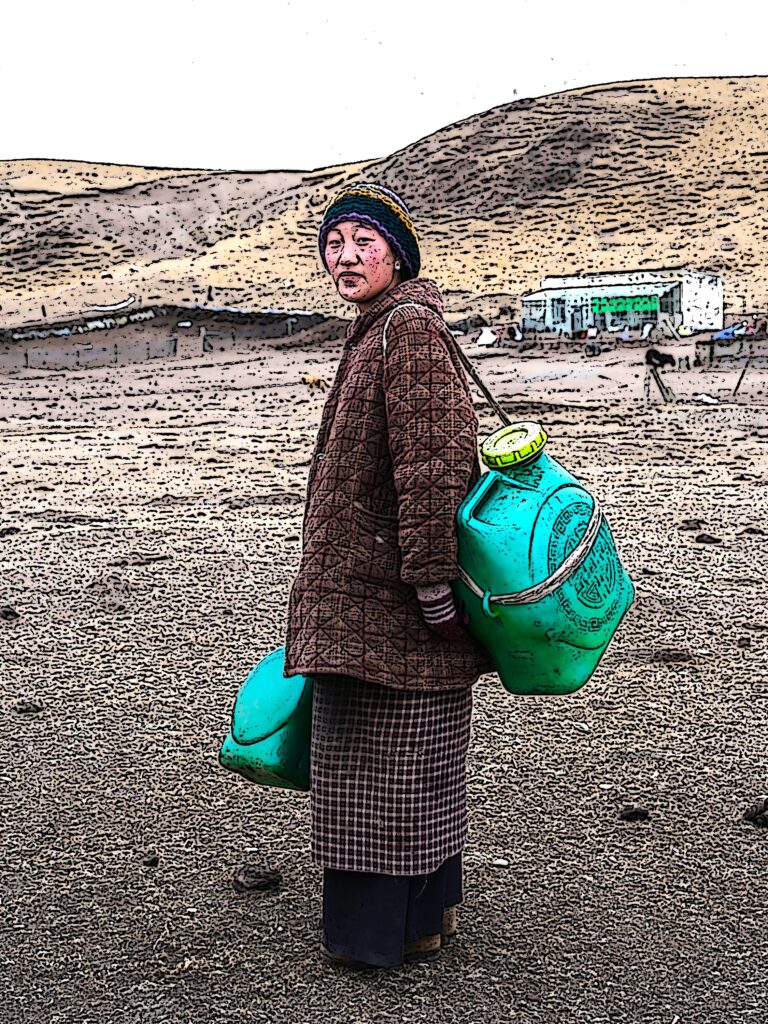
Output Image
Here we have our output, if you want this output more flat and cartoonistic you need to adjust parameters. Until you achieve your desired output.
Understanding the Cartoonizing Process
1. Grayscale Conversion
Converting an image to grayscale simplifies the data and reduces computational complexity. This step is necessary for edge detection as it focuses on the intensity of the pixels rather than color information.
2. Median Blur
The median blur filter smoothens the image by replacing each pixel’s value with the median value of the neighboring pixels. This helps in removing noise while preserving edges, which is crucial for a cartoon-like appearance.
3. Adaptive Thresholding
Adaptive thresholding is used to segment the image by converting grayscale images into binary images. This step outlines the edges of the objects, giving a hand-drawn effect.
4. Bilateral Filter
The bilateral filter reduces the image’s noise while keeping the edges sharp. It performs well for cartoonizing because it smoothens areas of similar colors while preserving edge details.
5. Combining Edges and Colors
Combining the edge mask with the color image creates the final cartoon effect. This step merges the outlined edges with the smoothened colors to give the image a cartoonish look.
Advanced Cartoonizing Techniques
When it comes to cartoonizing an image, advanced techniques using deep learning models have revolutionized the process. Let’s explore these techniques and their implementation:
The Deep Learning Approach to Cartoonizing Images
Simplifying the Image
Deep learning models can analyze an image and identify the key shapes, lines, and colors that define the overall look and feel. They then use this information to simplify the image, removing unnecessary details and keep focusing on only important elements.
Stylizing the Image
Once the image is simplified, the deep learning model can apply a specific artistic style to it. This might involve adding bold outlines, exaggerating colors, or giving the image a hand-drawn appearance. The result is a cartoonized version of the original image that keeps the originality of the image.
Automating the Process
One of the biggest advantages of using deep learning for cartoonizing images is the speed and efficiency of the process. Rather than having to manually edit and manipulate each image, the deep learning model can do all the heavy lifting automatically. This makes it much faster and easier to create a large number of cartoonized images.
Customizing the Results
While the deep learning models are highly capable, you can also fine-tune the results to your specific preferences. This might involve adjusting the level of simplification, the intensity of the artistic style, or even combining multiple styles to create a unique look.
Comparison of Traditional Methods and AI-Based Methods
Traditional methods of cartoonization often use techniques such as edge detection and color simplification. While they work, they may lack the finesse and artistic touch of AI-based methods.
In contrast, AI methods use advanced neural networks trained for changing images. These models can mimic intricate artistic styles, creating results that look like they were hand-drawn.
Implementing Advanced Techniques with Code Examples
Here’s a basic example of using a pre-trained deep learning model for cartoonization in Python:
import cv2
import numpy as np
from cartoonize import Cartoonizer  # Example: Replace with actual model or library

# Load an image
image = cv2.imread('input_image.jpg')

# Initialize a cartoonizer model
cartoonizer = Cartoonizer()

# Cartoonize the image
cartoon_image = cartoonizer.cartoonize(image)

# Display the original and cartoonized images
cv2.imshow('Original Image', image)
cv2.imshow('Cartoonized Image', cartoon_image)
cv2.waitKey(0)
cv2.destroyAllWindows()
In this case, Cartoonizer() stands for adeep learning model or software library made for turning images into cartoons. Replace it with an actual implementation based on your chosen model or library.
By exploring these advanced methods, you can improve your Python projects for cartoonizing images with cutting-edge AI features.
Performance Optimization in Cartoonizing Images
To ensure efficient cartoonization of images, optimizing your image processing pipeline is essential. Here are detailed techniques and best practices
1. Techniques for Optimization:
- Algorithm Selection: Choose efficient algorithms like edge detection and bilateral filtering that balance accuracy and computational speed for cartoonizing images.
- Parameter Tuning: Fine-tune algorithm parameters (e.g., blur kernel size in bilateral filtering) to achieve the desired cartoon effect while minimizing processing time.
- Parallel Processing: Employ Python’s multi-threading or multiprocessing capabilities to distribute tasks across multiple CPU cores, accelerating computation.
- GPU Acceleration: Use GPU acceleration with OpenCV to transfer heavy computations to the GPU, significantly boosting performance for large-scale image processing tasks.
2. Best Practices for Large Images:
- Memory Management: Implement efficient memory management practices to handle large image files without exhausting system resources.
- Chunk Processing: Divide large images into smaller sections or tiles for processing, reducing memory usage and improving processing speed.
- Streaming Techniques: Adopt streaming methods to process images sequentially, optimizing performance for real-time applications.
3. Using GPU Acceleration with OpenCV:
- GPU-enabled Functions: Utilize OpenCV’s GPU-accelerated functions (e.g.,
cv2.cudamodule) for operations like bilateral filtering and edge detection, taking advantage of the parallel processing capabilities of GPUs - CUDA Integration: Ensure your system supports CUDA-enabled GPUs and install necessary drivers and libraries to enable GPU acceleration with OpenCV.
- Performance Benefits: GPU acceleration can lead to significant speedups in cartoonizing images, making real-time processing useful for applications requiring rapid image transformation.
By applying these optimization techniques and best practices, developers can enhance the performance of their Python-based image cartoonization projects. These approaches support efficient handling of large images.
Practical Applications of Cartoonizing Images
Practical Applications of Cartoonizing Images
Cartoonizing an image finds practical use across various fields due to its ability to transform photos into stylized, cartoon-like visuals. Here are some key applications:
1. Entertainment Industry:
- Animated Movies: Cartoonized images are fundamental in creating animated movies, offering a unique visual style that perfect for both children and adults.
- Video Games: Game developers use cartoonized graphics to enhance gameplay, making characters and environments visually appealing and unique.
2. Social Media and Marketing:
- Social Media Posts: Cartoonized images stand out on social media platforms, increasing engagement and conveying messages with creativity.
- Marketing Campaigns: Businesses use cartoonized visuals to make advertisements more attractive and memorable, helping in brand promotion and storytelling.
3. Benefits in Various Domains:
- Education: Cartoonized images simplify complex concepts, making learning materials more engaging and accessible for students of all ages.
- Healthcare: In medical training and patient education, cartoonized diagrams and illustrations simplify medical information, aiding in understanding and communication.
- Communication: Cartoonized avatars and emojis enhance communication in digital messaging and online forums, adding a fun and expressive dimension.
Project Ideas and Expansions
Here are more ways to explore cartoonizing images, combining it with other techniques, and creating interactive applications:
1. Combining Cartoonizing with Other Image Techniques:
- Face Detection: Use face detection algorithms to find faces in photos before applying cartoon effects automatically.
- Object Recognition: Improve object recognition by adding cartoonization, transforming visual data with a cartoon style.
2. Interactive Applications Using Cartoonized Images:
- Interactive Filters: Build apps where users can upload photos and instantly apply cartoon effects, adjusting details like line thickness and colors.
- Augmented Reality: Develop AR experiences that cartoonize real-world scenes in real-time using a camera, blending digital art with live video feeds.
These projects expand Python’s capabilities in image cartoonization.
Troubleshooting Common Issues and Solutions
Here’s a detailed guide to troubleshoot common problems when cartoonizing images, along with tips to enhance image quality:
1. Troubleshooting Common Issues:
- Problem: Image appears distorted or pixelated after cartoonization.
- Solution: Adjust parameters like blur size and edge detection thresholds to achieve a clearer cartoon effect without losing image quality.
- Problem: Cartoonized colors do not match the original image.
- Solution: Fine-tune color mapping and intensity adjustments to better reflect the original image’s colors in the cartoonized version.
- Problem: Slow processing speed or freezing during image cartoonization.
- Solution: Optimize code by implementing parallel processing techniques such as multi-threading or GPU acceleration with OpenCV to speed up computations.
2. Tips for Improving Cartoonized Image Quality:
- Preprocessing: Ensure images are properly preprocessed with noise reduction and sharpening techniques before applying cartoonization.
- Parameter Tuning: Experiment with different parameters in algorithms like bilateral filtering to find a balance between cartoon effect and image quality.
- Post-Processing: After cartoonization, adjust brightness, contrast, and color saturation to enhance visual appeal while maintaining the cartoon style.
- Validation: Compare cartoonized images with original photos to ensure the desired artistic effect is achieved without losing important details.
Conclusion
Learning how to cartoonizing an images with OpenCV and Python unlocks endless creative opportunities. Whether it’s for your own projects or professional goals, this guide gives you the skills and tools to turn everyday photos into captivating artworks. Explore, practice, and enter into a world where technology merges with artistic imagination.
External Resources
For more detailed information and resources on cartoonizing images using Python and OpenCV, consider exploring the following external sources:
- OpenCV Documentation:
- Official documentation from OpenCV provides comprehensive guides, tutorials, and API references for image processing and cartoonization techniques.
- Website: OpenCV Documentation
- Python Documentation:
- Python’s official documentation offers insights into Python programming language features, libraries, and tools useful for image processing tasks.
- Website: Python Documentation






Leave a Reply